This weekend, I found myself with a bit of extra time on my hands. Not alot but enough to fit in a project! Weird, as finals are coming up and there's large papers and projects coming due. But I didn't look to hard at it. You know, grabbed opportunity when it struck. I'm just going to thank myself for finishing some projects early and move on!!
I decided to reupholster my desk chair that was in serious need of a new seat cover.
It's a chair that was purchased to serve as my desk chair from an estate sale. Some poor elderly widdow probably just lost his wife and I reeped the benifits. No no, I kidd. I've been to alot of estate sales, and while alot of them are due to a death in the family, it's really not the only reason that estate sales occur. But I digress.
Step 1: involves removing the seat from the frame of the chair. A simple enough task with this chair as it has no screws holding the seat down. Below is the seat relieved of it's duty, lining out it's back.
Step 2: Remove ALL the staples holding down the black backing. There are alot of them, they are nearly side by side.
Yatta!
With the black back set to the side you've got the first vision of your new seat. It's actually a relatively old cushion pushing down into the center of a wooden frame.
Actually looks like it was well made at the beginning of it's life, but
what do I know? I'm just a busy DIYer so I'm not taking the time right
now to research. I'm going to forger ahead.
Step 3: Now remove ALL the staples holding down the worn stripped seat fabric. Attempt to avoid getting carpel tunnel syndrome due to repetitive movements required. Remember proper body mechanics and keep your wrists safe from undue damage.
Congratulations! Removing that layer of striped fabric reveals a currently attached amount of funny batting and what looks like the original seat covering. If you look closely at said original seat cover and cushion (that ugly looking form on the L side of the picture below) you can actually see rough fibers sticking out through the thinning gray/blue fabric from the 40's and searching for a body part to scratch.
I truthfully have no idea what type of animal is in this seat, and I'm
not sure I care to know at the moment. Safe to say, it would be
uncomfortable to sit on. It makes the extra batting make so much sense. While leads me to ...
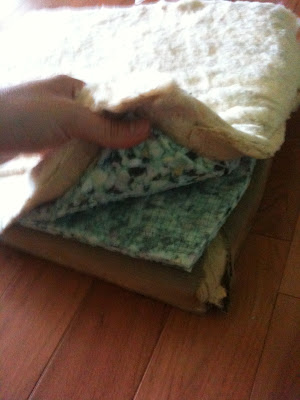
Step 4: Adding foam support. Using the seat itself as a tracing shape I marked to extra carpet foam, and cut out two chair shaped covers.
Step 5: Reapply the batting from previous upholster job. True it probably would have been better to completely replace the batting, but I don't own any and didn't want to increase the amount of time spend on the project (as school would suffer) and continued in the Quick-n-Lazy vain.
Below is a picture revealing the layers that are now in the seat.
Step 6: Not pictured, cutting out of seat cover fabric.
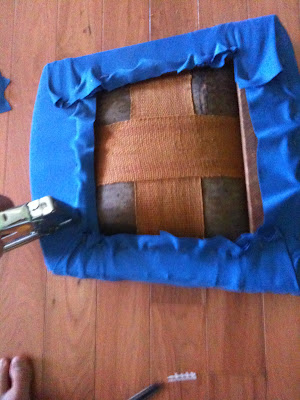
Step 7: Flip seat & all layers over on to the fabric which was cut to size and being stapling like a mad person! This is where you can stick it to future generations of reupholsters and fill the base with the metal staples or not, it's up to you. I went with a half & half option, using lots of staples to hold the seat cover fabric in place... but not so many when replacing the back blacking (as seen below).
Step 8: Replace the black backing and staple away. Here is where I chose to be more frugal with my staples, it's just backing, and really is just adding extra support to the seat cover fabric.
Staple Staple Staple
Step 9: Replace newly refreshed seat into the chair!
Step 10: Pat Back!


No comments:
Post a Comment